Having 5 growing children = quickly outgrown clothes. ~Sigh~ You just went out and updated all the clothes they outgrew last season and a month or so later they need bigger clothes! What is a mom to do? And what the heck do you do with the now too small clothes?
Well, was recently introduce to a neat new website called thredUP. (A special thanks to Amber of Learning Motherhood) This site allows you to search for boxes of clothing that suit you needs and allows you to create boxes of your old stuff to get rid of.
How does it work? It's like this...first you gotta sign up. You do that here: ThredUp. When you sign up you are allotted a certain number of picks based on some of your information. For example...military families are given a free extra pick a month. In my case...I am allotted 4 picks a month. I can now go onto thredUP and search boxes and pick 4 boxes. (it does get a little confusing). Now, technically for every box I pick I have to post a box and "give it away" (so to speak).
I guess the best way to put it...you are swapping boxes and for every one box you take you gotta give one box; attempting to keep your "swap balance" at a 0. I think their site can explain it better...Anyway....
Okay start searching boxes. You can input information like boy or girl, sizes (from newborn to 20 & no size), seasons, types (tops, bottoms, mixture of both), and specialty (girl scouts, boy scouts, ballet...etc.) When you find a box you would like you get to "purchase it." You add it to your cart and you check out. The cost? It is standard across the board. You pay $5 + Shipping. EVERYONE ships Priority Flat Rate box. I do believe that it is the $10.70
So, my first box...the description was basic. Size 12 months pants, coveralls, and 2 shirts. I picked this box because my 5 month old was in desperate need for pants. Now at Walmart 1 pair of brand new pants is $8...I know this because I just purchased him 2 pair...so total of $16 + tax.
Okay...back to my box. When I received it inside was something like 3 pairs of pants, 2 sets of coveralls, 1 sweatsuit outfit, and 2 flannel shirts (which also cost $8 at Walmart BTW). And the clothes are in EXCELLENT condition!!!!
My next box should be here late this week/early next week. It will have 5 complete outfits and 2 extra shirts for my son!!!! Some well known name brands, some "lesser" brands...but all good clothes. I can't wait to see them. I also ordered a "custom box" for my oldest daughter. She requested a pair of "footy" pajamas. However, Target was already out of her size. Now, while this is the only item in the box....the pajamas are NWT (new with tags) and originally cost $25! Not a bad deal I think!
So, what have I "offered"? Well, my first box shipped out contained my oldest daughters pants she outgrew. They were like new. The owner received them and loved them! I have listed some of Sean's clothes that he has outgrown...but since they are all summer and mostly onsies, I'm having trouble "giving them away" since it is a popular size.
Okay, I hear you asking...how can you guarantee that you aren't going to get a c**py box...something full of junk you can't use? Well, that is where the reviews come in. The receiver has the option of rating the box 1 to 4 stars. One meaning the box was totally useless and 4 meaning that the box was as promised...no stains, rips, tears, missing buttons, etc. Then comes the "stylies"; this allows you to rate how the box fits your lifestyle. They range from 1 to 10. If the box is perfect, you will wear everything it in...you give a high rate. If it is something that just isn't your style and you aren't sure it will stay in your closet long...you give it a lower rate. But, before you go and give a box a low score...contact the sender. Many (if not all) of the threUpers value their high ratings. Many are willing to work with you to help you get that perfect box.
ThredUp also has a Facebook page. Check them out at http://www.facebook.com/#!/thredup. There you can sometimes find pictures of what is in the box, ask questions, place "special" requests, and a whole lot more!
So, check them up! Trust me! It's worth it!!!!
Tuesday, November 23, 2010
Friday, November 12, 2010
From Halloween to Thanksgiving...
Halloween is officially over and Thanksgiving is quickly approaching. And around here that means fresh baked, homemade pumpkin pie!!! And no...none of that canned stuff. My pies are made from fresh pumpkin!
You know...I blame my parents for this. I grew up spoiled to say the least. I remember the story of the pumpkin field. I say field because the pumpkins took over the WHOLE field. I was really young, maybe under the age of 5? Anyway, it was gardening time. And of course being the "big helper" I was I insisted on helping plant the garden. So, my father (being supper smart), created me a special row. Marked it off and everything. Then he gave me a packet of pumpkin seeds and showed me how to plant them neatly down the said row. He showed me how to cover them, keep then neat and straight...then put me to work while he worked in another section. A little while latter I proudly showed him my neat row of pumpkin seeds. He and mom were so proud!
 Fast forward a few months. My pumpkins were growing rather well in my neat little row... as well as in the corn, in the green beans, in the potatoes, in the...well, you get the idea. We had a lot of pumpkins that year! To bad the flood washed most of them away.
My next memory is of my mother cutting up the pumpkins and cooking them in the oven until they were tender...oh the house was smelling so good...yet, not the smell we were waiting on! She would grind the pumpkin through the colander, then pour the smashed pumpkin into clean, sterile jars, then process them...all in preparation for the next step...pumpkin pie.
Now fast forward a few more years. I am a mother of a few beautiful children. They are rather young themselves. We wanted to start our own Halloween tradition, but I didn't want to give my children a knife, and they wouldn't stick their hands in the pumpkins. Really, no fun for them. So, we started a tradition of painting our pumpkins.
 We painstakingly explore the pumpkin patch for the perfect pumpkins. Next we look for our inspiration and then we paint! (we use a washable paint...which kinda sucks when it rains...) After that they get used for decoration on the front porch.
After Halloween I take over. I wash the paint off, cut the pumpkins in 1/2, and scoop out the insides with an ice cream scoop.
Next I place the pumpkin 1/2s in a baking pan and add about an inch of water. Pop them in the oven and bake at 350* for about an hour. Sometimes it takes longer, sometimes not so long. Cook them until you can poke a fork in through the shell.
After the pumpkin is cooked remove it from the oven and let it cool. After it has cooled enough to handle just peel the shell of the pumpkin off! Smooth!
Next, dig out the food processor and puree the cooked pumpkin. I let it puree for a couple of minuets just to ensure that everything is cut up well.
After it is pureed I put the pumpkin mush through a sieve. This allows me to make sure there are no unprocessed parts and no parts of the shell that may have ended up in by mistake. If the pumpkin is thin and watery I just tap the sieve on the side of the bowl, letting the pumpkin just slide through all on it's own. If it is a ticker puree I use the back of a spoon to push it through. Either way...all the unwanted parts doesn't make it through!
Finally I measure it out into freezer bags. My recipe calls for 2 cups of pumpkin puree. Since I double my recipes I go ahead and measure it out into 4 cup increments. Seal the bags, label them, and pop them in the deep freeze. I now have fresh pumpkin for pies, breads, and even fudge (I haven't tried that one yet!!!!).
When it is time I dig out my trusty The Good Housekeeping Cook book and turn to page 512 and bake up a batch of our favorite Pilgrim Pumpkin Pies.
Pilgrim Pumpkin Pie (remember I double mine, but this is the original)
1 9-inch unbaked pie crust (I purchase 3 deep dish pie crusts from the store...I can't make a pie crust to save my life!!!!)
2 cups of pumpkin
1 13-oz can evaporated milk
2 eggs
1/2 cup packed brown sugar
1/2 cup sugar
1 1/2 teaspoons cinnamon (I ALWAYS add more!!! lol)
1/2 teaspoon ginger
1/2 teaspoon nutmeg
1/2 teaspoon allspice
1/2 teaspoon ground cloves
1/2 teaspoon salt
Preheat oven to 425*
In large bowl, with mixer at medium speed, beat pumpkin with next 10 ingredients until well mixed. Place pie plate on oven rack; pour pumpkin mixture into pie crust; bake 15 minutes. Turn oven control to 350 *and bake 35 minutes more or until filling is set. Cool.
Now, as I said, I double my recipe. This will fill 3 - 9 inch deep dish pie crusts. Before I fill the pie crust I cut foil to fit around the edge of the crust to keep it from burning. Then I fill the pie crusts and bake. It takes me longer than 35 min to bake...so bake until a knife stuck in the middle of the pie comes out clean. Just make sure you don't stick your knife all the way through the pan!!!!
So, we have gone from Halloween to Thanksgiving! Enjoy!!!!!
You know...I blame my parents for this. I grew up spoiled to say the least. I remember the story of the pumpkin field. I say field because the pumpkins took over the WHOLE field. I was really young, maybe under the age of 5? Anyway, it was gardening time. And of course being the "big helper" I was I insisted on helping plant the garden. So, my father (being supper smart), created me a special row. Marked it off and everything. Then he gave me a packet of pumpkin seeds and showed me how to plant them neatly down the said row. He showed me how to cover them, keep then neat and straight...then put me to work while he worked in another section. A little while latter I proudly showed him my neat row of pumpkin seeds. He and mom were so proud!

My next memory is of my mother cutting up the pumpkins and cooking them in the oven until they were tender...oh the house was smelling so good...yet, not the smell we were waiting on! She would grind the pumpkin through the colander, then pour the smashed pumpkin into clean, sterile jars, then process them...all in preparation for the next step...pumpkin pie.
Now fast forward a few more years. I am a mother of a few beautiful children. They are rather young themselves. We wanted to start our own Halloween tradition, but I didn't want to give my children a knife, and they wouldn't stick their hands in the pumpkins. Really, no fun for them. So, we started a tradition of painting our pumpkins.

After Halloween I take over. I wash the paint off, cut the pumpkins in 1/2, and scoop out the insides with an ice cream scoop.
Next I place the pumpkin 1/2s in a baking pan and add about an inch of water. Pop them in the oven and bake at 350* for about an hour. Sometimes it takes longer, sometimes not so long. Cook them until you can poke a fork in through the shell.
After the pumpkin is cooked remove it from the oven and let it cool. After it has cooled enough to handle just peel the shell of the pumpkin off! Smooth!
Next, dig out the food processor and puree the cooked pumpkin. I let it puree for a couple of minuets just to ensure that everything is cut up well.
After it is pureed I put the pumpkin mush through a sieve. This allows me to make sure there are no unprocessed parts and no parts of the shell that may have ended up in by mistake. If the pumpkin is thin and watery I just tap the sieve on the side of the bowl, letting the pumpkin just slide through all on it's own. If it is a ticker puree I use the back of a spoon to push it through. Either way...all the unwanted parts doesn't make it through!
Finally I measure it out into freezer bags. My recipe calls for 2 cups of pumpkin puree. Since I double my recipes I go ahead and measure it out into 4 cup increments. Seal the bags, label them, and pop them in the deep freeze. I now have fresh pumpkin for pies, breads, and even fudge (I haven't tried that one yet!!!!).
When it is time I dig out my trusty The Good Housekeeping Cook book and turn to page 512 and bake up a batch of our favorite Pilgrim Pumpkin Pies.
Pilgrim Pumpkin Pie (remember I double mine, but this is the original)
1 9-inch unbaked pie crust (I purchase 3 deep dish pie crusts from the store...I can't make a pie crust to save my life!!!!)
2 cups of pumpkin
1 13-oz can evaporated milk
2 eggs
1/2 cup packed brown sugar
1/2 cup sugar
1 1/2 teaspoons cinnamon (I ALWAYS add more!!! lol)
1/2 teaspoon ginger
1/2 teaspoon nutmeg
1/2 teaspoon allspice
1/2 teaspoon ground cloves
1/2 teaspoon salt
Preheat oven to 425*
In large bowl, with mixer at medium speed, beat pumpkin with next 10 ingredients until well mixed. Place pie plate on oven rack; pour pumpkin mixture into pie crust; bake 15 minutes. Turn oven control to 350 *and bake 35 minutes more or until filling is set. Cool.
Now, as I said, I double my recipe. This will fill 3 - 9 inch deep dish pie crusts. Before I fill the pie crust I cut foil to fit around the edge of the crust to keep it from burning. Then I fill the pie crusts and bake. It takes me longer than 35 min to bake...so bake until a knife stuck in the middle of the pie comes out clean. Just make sure you don't stick your knife all the way through the pan!!!!
So, we have gone from Halloween to Thanksgiving! Enjoy!!!!!
Doing Laundry
It has been a while since I last posted. But, as most of you know...life with 5 growing children makes things rather hectic! But of course I am LOVING every moment of it!
And speaking of life with 5 children (and 2 adults), one of those in cloth diapers, comes a LOT of laundry. And laundry means going through a lot of laundry detergent. And of course, someone is allergic to something and finding 1 detergent to meet all of our needs is tricky at best. But, being the wonderful mother I am (see, I have no shame what-so-ever! lol) I eventually figured out that Tide works great for all my family members. But, not to the best for cloth diapers.

Further experimentation led to the discovery that Costco's Kirkland brand is just about the exact same thing as Tide. And the Free and Clear brand is great for all our sensitive skinned kids. But, as mentioned it gets expensive. Last time I purchased a container it was about $18.

So, after searching and researching I found that Tip Nut had some interesting recipes for making home made detergent (and fabric softener and fabric softer sheets too!).
Now most recipies call for the following items:
Washing Soda (this is NOT the same as baking soda!)
20 Mule Team Borax
Bar soap (similar to Zote)
Now, notice the prices of these items:
Okay...so start up cost for "ingredients" about $8. So far 1 box of Washing Soda will make about 3 batches. A box of 20 Mule Borax will make and estimated 4 batches. And a single bar of Zote will make 2 batches.
In addition to the "ingredients" I purchased the following items: 1 Set of measuring cups and spoons and 1 cheese grater. I did not want to use the ones purposed for food preparation. I guess you could, just wash them well...but I would rather have a separate set. Each were picked up for $1 from the Dollar Tree. I also purchased a 5 gallon bucket with lid from Home Depot for about $5.
So, in the very beginning I have paid about $15 to get started.
Next comes the recipie:
1Quart Boiling Water
2 Cups grated Zout
2 cups Washing Soda
2 cups 20 Mule Borx
2 gallons cool water
Now the first thing you need to do is use the cheese grater to finely grate you Zout bar. This does go quickly. The finer you can grate it the easier it is to disolve it.
Next, bring 1 quart of water to boil. As it starts boiling add the grated Zout to the boiling water and stir. Since it does take a while turn the heat down and stir. Mine likes to clump up some when I first add it to the boiling water. I like to let it sit and heat for a few moments...but the more you stir it the quicker the Zout will dissolve. Don't worry, there will be some soapy bubbles...but it really ins't a big deal. Don't beat it...or you'll get a bubbly mess!
While that is melting add the Washing Soda and 20 Mule Borax to your 5 Gallon Bucket. Break up any lumps. This will make it much easier to stir when it is time!
After the Zout is thoroughly dissolved in the boiling water pour it into the 5 Gallon bucket with the Washing Soda and Borax and stir well. I like to pour it through a sieve first just to make sure there are absolutely NO lumps of soap in it.
After it is mixed well add the 2 Gallons of cool water. Don't make the same mistake I did thinking that if I used hot water it would guarantee that my soaps are dissolved. This creates a solid block of soap sitting on top of water. Cool water is much better!
Now, if you want to add some "pretty smells" like that of Tide or Downy...you can add 10 to 15 drops of essential oil after it has cooled down.
Now, what you will have is a bucket with a pink gel substance. Every time you use it stir it well. Then add 1/4 cup to your laundry. I use a front loader which has the option to either have a powder detergent or liquid detergent. I have found that I have to use the power detergent setting, or it glop's up in the dispenser. You can either use a measuring up, or do I what I did...recycle the cups that come with the Kirkland detergent. If you fill it to the lower line in the cup it is exactly 1/4 cup! I dump the detergent in the dispenser, then throw the cup in with the laundry so there is no mess on my washer, counters, etc. Clean!
So, the big question...does this stuff really clean your laundry? Well, I put it through 2 of the ultimate tests. The first was washing poopy diapers...and they came out clean! Now mind you...baby poop does stain...but no detergent I had used before this got the stains out. The sun works great for this job! But they felt clean, smelled clean, and no ammonia in them from pee.
The second test...week old teenager pe clothes! (Whew! I'm lucky to get them to bring them home every week...I seriously think it was 2 weeks old at this time). It worked great! No odor and they were clean. Good enough for me!
Today I made my second batch. The first batch, I made about 2 1/2 months ago. And like I said...I do a LOT of laundry in this house! A container of Kirkland Detergent lasted about that long too. So, even with my start up costs of purchasing the extra measuring cups, grater, and bucket...it has already paid for itself. In fact...I paid less for the start up than I would have purchasing a container of detergent!
I use my detergent in my HE Front Loader machine. You won't see a lot of bubbles as it is agitating...but that is okay. Your laundry is getting clean!
Now for fabric softener....using White Distilled Vinegar works like a charm! 1/4 cup in the fabric softener dispenser or Downy Ball. Again, if you would like that "pretty smell" add about 24 drops of essential oil to the jug. Mind that you mark your jug for laundry only...otherwise you are going to have very fowl tasting food!
 Fabric Softener Sheets:
For this one you can use your favorite fabric softener. What I did was cut up some sponges ( I had gotten a bunch from an old House Party that didn't get handed out. I cut them in half). In an old baby wipe container I mixed 4 tablespoons of my favorite fabric softener and 1/4 cup of water...then soaked my sponges. It only took a couple. I squeeze out the excess and throw them in the dryer. When the dryer is done I just put them back in my container.
Well, that is about all I have time for today! Still have a pile of fresh laundry waiting to be folded. Happy Laundry day!!!!
And speaking of life with 5 children (and 2 adults), one of those in cloth diapers, comes a LOT of laundry. And laundry means going through a lot of laundry detergent. And of course, someone is allergic to something and finding 1 detergent to meet all of our needs is tricky at best. But, being the wonderful mother I am (see, I have no shame what-so-ever! lol) I eventually figured out that Tide works great for all my family members. But, not to the best for cloth diapers.
Further experimentation led to the discovery that Costco's Kirkland brand is just about the exact same thing as Tide. And the Free and Clear brand is great for all our sensitive skinned kids. But, as mentioned it gets expensive. Last time I purchased a container it was about $18.

So, after searching and researching I found that Tip Nut had some interesting recipes for making home made detergent (and fabric softener and fabric softer sheets too!).
Now most recipies call for the following items:
Washing Soda (this is NOT the same as baking soda!)
20 Mule Team Borax
Bar soap (similar to Zote)
Now, notice the prices of these items:
 |
| $3 for 55oz: Found at the military commissary |
 |
| $4 for 76 oz; found at Walmart |
 |
| $0.99 a bar; found at Walmart |
In addition to the "ingredients" I purchased the following items: 1 Set of measuring cups and spoons and 1 cheese grater. I did not want to use the ones purposed for food preparation. I guess you could, just wash them well...but I would rather have a separate set. Each were picked up for $1 from the Dollar Tree. I also purchased a 5 gallon bucket with lid from Home Depot for about $5.
So, in the very beginning I have paid about $15 to get started.
Next comes the recipie:
1Quart Boiling Water
2 Cups grated Zout
2 cups Washing Soda
2 cups 20 Mule Borx
2 gallons cool water
Now the first thing you need to do is use the cheese grater to finely grate you Zout bar. This does go quickly. The finer you can grate it the easier it is to disolve it.
Next, bring 1 quart of water to boil. As it starts boiling add the grated Zout to the boiling water and stir. Since it does take a while turn the heat down and stir. Mine likes to clump up some when I first add it to the boiling water. I like to let it sit and heat for a few moments...but the more you stir it the quicker the Zout will dissolve. Don't worry, there will be some soapy bubbles...but it really ins't a big deal. Don't beat it...or you'll get a bubbly mess!
While that is melting add the Washing Soda and 20 Mule Borax to your 5 Gallon Bucket. Break up any lumps. This will make it much easier to stir when it is time!
After the Zout is thoroughly dissolved in the boiling water pour it into the 5 Gallon bucket with the Washing Soda and Borax and stir well. I like to pour it through a sieve first just to make sure there are absolutely NO lumps of soap in it.
After it is mixed well add the 2 Gallons of cool water. Don't make the same mistake I did thinking that if I used hot water it would guarantee that my soaps are dissolved. This creates a solid block of soap sitting on top of water. Cool water is much better!
Now, if you want to add some "pretty smells" like that of Tide or Downy...you can add 10 to 15 drops of essential oil after it has cooled down.
Now, what you will have is a bucket with a pink gel substance. Every time you use it stir it well. Then add 1/4 cup to your laundry. I use a front loader which has the option to either have a powder detergent or liquid detergent. I have found that I have to use the power detergent setting, or it glop's up in the dispenser. You can either use a measuring up, or do I what I did...recycle the cups that come with the Kirkland detergent. If you fill it to the lower line in the cup it is exactly 1/4 cup! I dump the detergent in the dispenser, then throw the cup in with the laundry so there is no mess on my washer, counters, etc. Clean!
So, the big question...does this stuff really clean your laundry? Well, I put it through 2 of the ultimate tests. The first was washing poopy diapers...and they came out clean! Now mind you...baby poop does stain...but no detergent I had used before this got the stains out. The sun works great for this job! But they felt clean, smelled clean, and no ammonia in them from pee.
The second test...week old teenager pe clothes! (Whew! I'm lucky to get them to bring them home every week...I seriously think it was 2 weeks old at this time). It worked great! No odor and they were clean. Good enough for me!
Today I made my second batch. The first batch, I made about 2 1/2 months ago. And like I said...I do a LOT of laundry in this house! A container of Kirkland Detergent lasted about that long too. So, even with my start up costs of purchasing the extra measuring cups, grater, and bucket...it has already paid for itself. In fact...I paid less for the start up than I would have purchasing a container of detergent!
I use my detergent in my HE Front Loader machine. You won't see a lot of bubbles as it is agitating...but that is okay. Your laundry is getting clean!
Now for fabric softener....using White Distilled Vinegar works like a charm! 1/4 cup in the fabric softener dispenser or Downy Ball. Again, if you would like that "pretty smell" add about 24 drops of essential oil to the jug. Mind that you mark your jug for laundry only...otherwise you are going to have very fowl tasting food!
For this one you can use your favorite fabric softener. What I did was cut up some sponges ( I had gotten a bunch from an old House Party that didn't get handed out. I cut them in half). In an old baby wipe container I mixed 4 tablespoons of my favorite fabric softener and 1/4 cup of water...then soaked my sponges. It only took a couple. I squeeze out the excess and throw them in the dryer. When the dryer is done I just put them back in my container.
Well, that is about all I have time for today! Still have a pile of fresh laundry waiting to be folded. Happy Laundry day!!!!
Monday, November 1, 2010
Trick-or-Treat!
With 5 kids in costumes...Halloween can be tricky and expensive at best. This year I kinda got lucky. Instead of buying a bunch of costumes each child wanted to create their own look. Some of the outfits are recycled, some are sewn...any way it goes...it was a lot cheaper than buy them all costumes!
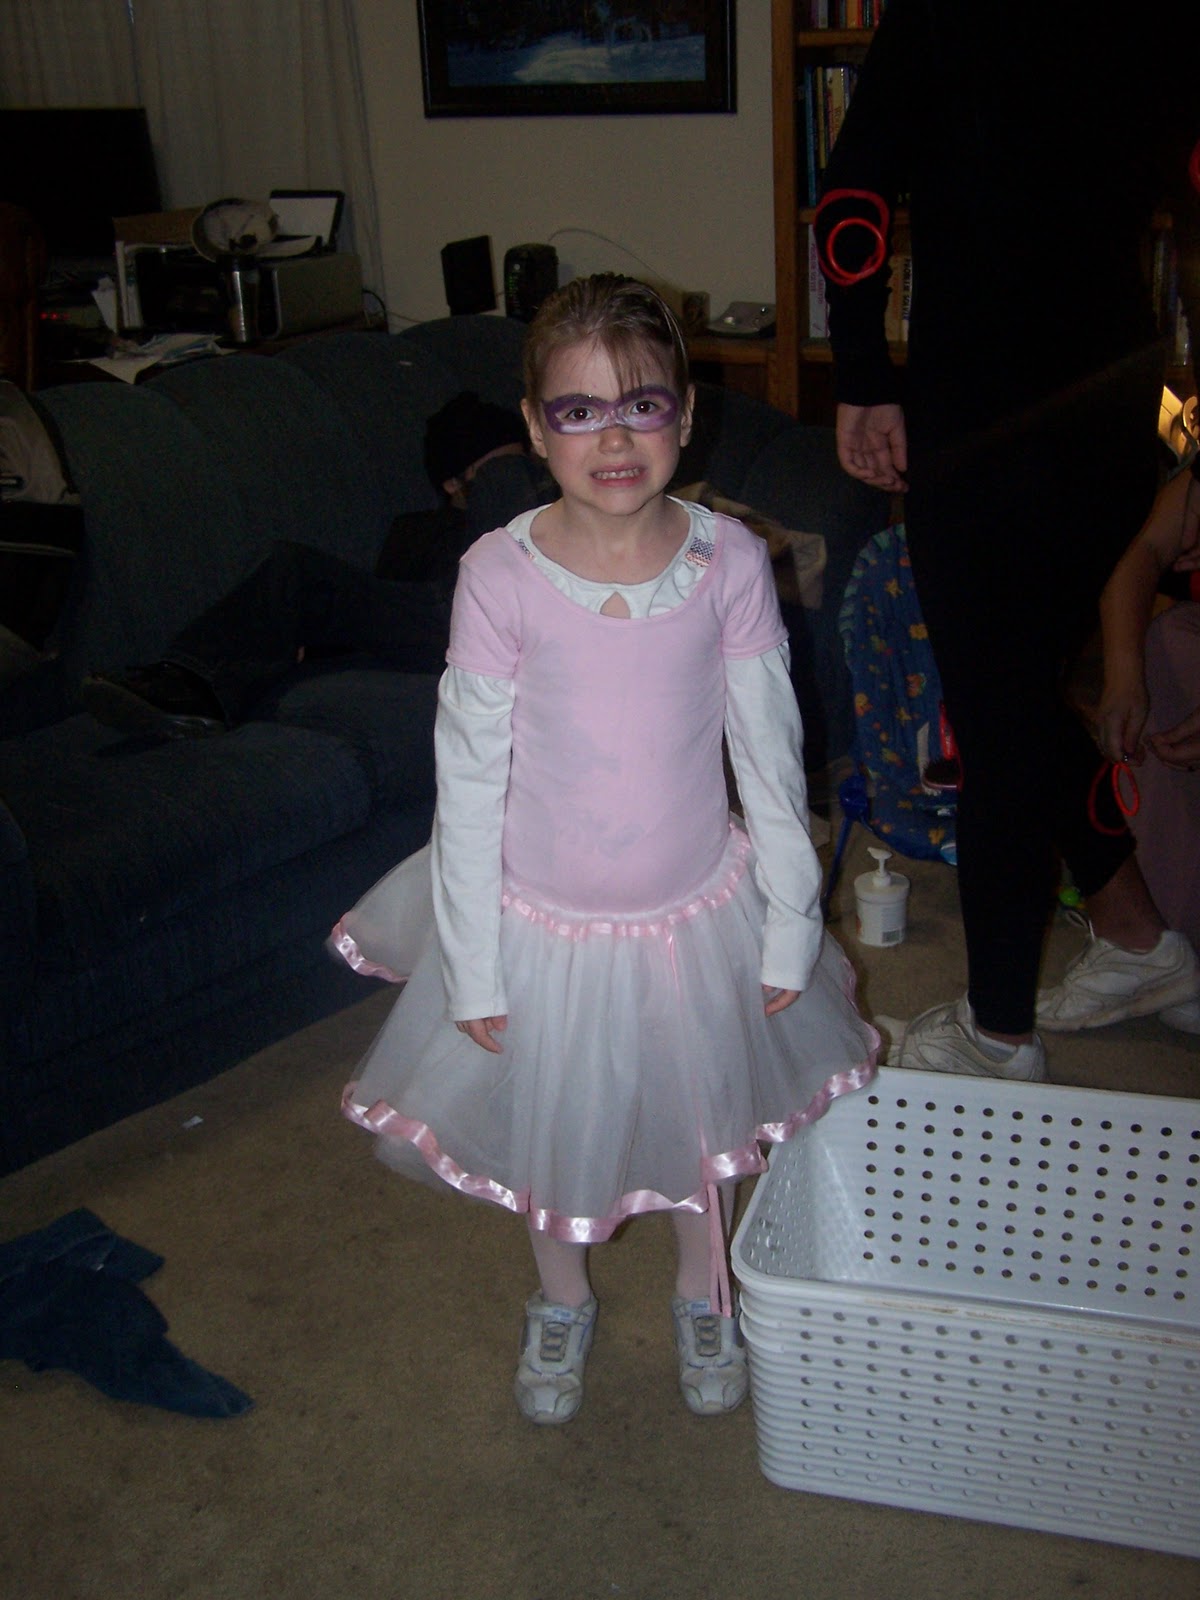
First up is my 5 year old daughter. She wanted to be a ballerina. Her costume is 100% recycled. You see, last year for a Preschool performance she had to dress like a ballerina. We purchased her tights and leotard and I made her tutu and hair piece. She kept the outfit for dress up...and she wanted to use it for Halloween! A little face make-up to make her feel special and we are done! Easy!

In line second is my 9 year old son. He first wanted to be a snow boarder...didn't think I could pull that one off very well. His second choice...a robber. Now, I’m the type of person who will look on the web for inspiration on which direction to take with ideas. So, we hunted a picture and came up with:

Simple enough I think. We raided his closet and found a black turtle neck shirt, a pair of dark jeans, and his black tennis shoes. Raided his sisters’ closet and found black gloves. The hat had me puzzled. That is until my husband looked at the picture and suggested a black watch cap that the Navy uses. Great! He picked up one from the Navy Exchange on his way home. A quick trip to the Dollar Tree adds a black flashlight. A quick search through the attic yields a black sack. I dug out my old black eye shadow and now my 9 year old has a “5 o’clock shadow.”

My 9 year old is ready for Trick-or Treating.
Next in line is my 13 year old daughter. Her costume turned out to be the trickiest. She wanted to be a Pokémon Umbreon. Now, they don’t sell these costumes anywhere we have ever looked. IF you are lucky the only Pokémon you will find is a Pikachu. After a search of the web we located the following picture:

The first part is easy. We raid her closet for a black shirt and black leggings. The ears and tail were what kicked me in the bum. It took several tries to get it just right. I first tried tracing what looked like Umbreon ears onto a piece of cardboard. I used the cardboard to trace a pattern onto a recycled black sheet that I raided from the linen closet. My first attempt after that was to glue the fabric to the cardboard…what a mess and a nightmare!!!! After some contemplation I decided to re-cut the ears out of the black sheet, sew two sides together and stuff them; which then required the demolition of an old throw pillow. This step rather upset my husband…I forgot it was his favorite pillow, even though it was nasty, falling apart, and beyond repair. During my trip to the Dollar Tree for the flashlight, I also invested in a black headband. After stuffing the ears and gluing red felt (salvaged from the fabric box of scraps I keep around) around to serve as rings, I then hand sewed the ears to the headband.
Finally was the tail. I wasn’t sure of the shape, so my daughter drew it onto a paper bag. I used this as a pattern to cut the tail out of the recycled sheet. Again, sewed the pieces together, stuffed them, glued a red ring around the end and we had a tail. I then cut red rings out of the red felt and glued them to the black shirt and leggings. Pinning it together we had an Umbreon.
Now, my daughter wanted her “rings” to glow. I went to The Dollar Tree, Big Lots, Walmart, Target, and Toys R Us to search for red glow sticks. Everyone had every color BUT red! Last minuet genius struck and we headed to Party City. Two dollars later and we now had glow sticks. As she got dressed I activated the glow sticks and a quick stitch allowed me to attach them to her costume. Black face makeup, a creative trick with her headband to allow a glow stick circle to hang on her forehead and Walla!

She wasn’t thrilled with how her face makeup turned out…but 2/3 of the people we ran into while Trick-or-Treating knew she was a Pokémon; and ½ of those people knew she was an Umbreon! She should be proud of her inspiration.
Then came the baby. At 4 ½ months he wears size 12 month clothes! Mainly to get over his diaper bum! We had been given a cute little sleeper outfit that said “My First Halloween, Don’t Scare Me!” Of course this is in a size of 6 months. My husband saw another baby in a cute little Devil costume. He then saw the same costume on Party City’s commercial. So, we just “had” to get it! Talk about a cute little devil! (no pun inteneded!)

Last was my oldest son. At the age of 14 he decided to stay home and hand out candy. He didn’t want to dress up. Needless to say Mommy was a bit disappointed. I am not ready for him to grow up. Even at 6’ 2”! But, I just couldn't leave him out of the pictures!!!!!
 They all had a blast and it was a WONDERFUL night of Trick-or-Treating!
First up is my 5 year old daughter. She wanted to be a ballerina. Her costume is 100% recycled. You see, last year for a Preschool performance she had to dress like a ballerina. We purchased her tights and leotard and I made her tutu and hair piece. She kept the outfit for dress up...and she wanted to use it for Halloween! A little face make-up to make her feel special and we are done! Easy!
In line second is my 9 year old son. He first wanted to be a snow boarder...didn't think I could pull that one off very well. His second choice...a robber. Now, I’m the type of person who will look on the web for inspiration on which direction to take with ideas. So, we hunted a picture and came up with:
Simple enough I think. We raided his closet and found a black turtle neck shirt, a pair of dark jeans, and his black tennis shoes. Raided his sisters’ closet and found black gloves. The hat had me puzzled. That is until my husband looked at the picture and suggested a black watch cap that the Navy uses. Great! He picked up one from the Navy Exchange on his way home. A quick trip to the Dollar Tree adds a black flashlight. A quick search through the attic yields a black sack. I dug out my old black eye shadow and now my 9 year old has a “5 o’clock shadow.”

My 9 year old is ready for Trick-or Treating.
Next in line is my 13 year old daughter. Her costume turned out to be the trickiest. She wanted to be a Pokémon Umbreon. Now, they don’t sell these costumes anywhere we have ever looked. IF you are lucky the only Pokémon you will find is a Pikachu. After a search of the web we located the following picture:

The first part is easy. We raid her closet for a black shirt and black leggings. The ears and tail were what kicked me in the bum. It took several tries to get it just right. I first tried tracing what looked like Umbreon ears onto a piece of cardboard. I used the cardboard to trace a pattern onto a recycled black sheet that I raided from the linen closet. My first attempt after that was to glue the fabric to the cardboard…what a mess and a nightmare!!!! After some contemplation I decided to re-cut the ears out of the black sheet, sew two sides together and stuff them; which then required the demolition of an old throw pillow. This step rather upset my husband…I forgot it was his favorite pillow, even though it was nasty, falling apart, and beyond repair. During my trip to the Dollar Tree for the flashlight, I also invested in a black headband. After stuffing the ears and gluing red felt (salvaged from the fabric box of scraps I keep around) around to serve as rings, I then hand sewed the ears to the headband.
Finally was the tail. I wasn’t sure of the shape, so my daughter drew it onto a paper bag. I used this as a pattern to cut the tail out of the recycled sheet. Again, sewed the pieces together, stuffed them, glued a red ring around the end and we had a tail. I then cut red rings out of the red felt and glued them to the black shirt and leggings. Pinning it together we had an Umbreon.
Now, my daughter wanted her “rings” to glow. I went to The Dollar Tree, Big Lots, Walmart, Target, and Toys R Us to search for red glow sticks. Everyone had every color BUT red! Last minuet genius struck and we headed to Party City. Two dollars later and we now had glow sticks. As she got dressed I activated the glow sticks and a quick stitch allowed me to attach them to her costume. Black face makeup, a creative trick with her headband to allow a glow stick circle to hang on her forehead and Walla!

She wasn’t thrilled with how her face makeup turned out…but 2/3 of the people we ran into while Trick-or-Treating knew she was a Pokémon; and ½ of those people knew she was an Umbreon! She should be proud of her inspiration.
Then came the baby. At 4 ½ months he wears size 12 month clothes! Mainly to get over his diaper bum! We had been given a cute little sleeper outfit that said “My First Halloween, Don’t Scare Me!” Of course this is in a size of 6 months. My husband saw another baby in a cute little Devil costume. He then saw the same costume on Party City’s commercial. So, we just “had” to get it! Talk about a cute little devil! (no pun inteneded!)

Last was my oldest son. At the age of 14 he decided to stay home and hand out candy. He didn’t want to dress up. Needless to say Mommy was a bit disappointed. I am not ready for him to grow up. Even at 6’ 2”! But, I just couldn't leave him out of the pictures!!!!!

Subscribe to:
Comments (Atom)